| CARING FOR YOUR PICTURE FRAME |
 |
|
Once your picture frame is hung on the wall, you may be inclined to just ignore it for the next decade. That is probably not the best idea. Below is a collection of tips and steps for cleaning both the glazing (glass or plexiglass) and the frame itself.
Whether your frame has been professionally constructed and sealed, or you like to swap out your photographs regularly, there are different methods for keeping your wall or desktop displays in top condition.
|
SUMMARY
| PRIOR TO FRAMING |
CLEANING THE GLASS |
CLEANING THE FRAME |
| Consider having special photographs scanned and prints made, instead of displaying the originals. |
Dust regularly, use a damp cloth or glass cleaner to remove stuck-on dirt, and clean completely when changing the photo. |
Dust regularly, and use the appropriate cleaning method depending on the frame materials. |
Want to read the quick version? Check out our blog post: Caring for Your Picture Frame.
|
| BEFORE FRAMING
|
 |
|
Keeping your picture frame clean is important, but most frames can be replaced. If the photographs or artworks you are framing are heirlooms, collectibles, or have great sentimental significance, you may not want to display them on your walls, where the sunlight can fade them and environmental changes can cause degradation.
This doesn't mean, however, that you can't display your special memories. For old photos and important images, we highly recommend creating digital copies and having prints made. This way, you can still display your pictures, but the delicate and precious originals can be kept safe elsewhere: out of direct light, away from oily fingers, and in acid-free storage that will not cause the paper to discolor or disintegrate.
You can scan you images yourself if you have a scanner at home and they are small in size (4x6's or 5x7's). For large images, or if you don't have a scanner, we are happy to create the digital images for you.
If you are ordering prints of your photographs, we are happy to scan any image smaller than 8x10" free of charge. We will then print copies on beautiful, quality fine art papers which will last much longer than the vintage papers on which your originals were made.
If you really want to display your old photographs, torn edges, yellowing and all, then we still recommend having the scanned first. This way, if anything ever does befall your original, you will at least have a backup copy of the image.
|

Old photographs should be treated with great care
|
| CLEANING THE GLAZING
|
 |
|
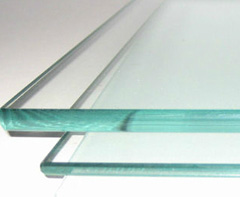
It is likely your picture frame glazing will require cleaning once in awhile, whether from fingerprint smudges, dust build up, or accidental spatters. This can be done using a soft cloth and glass cleaner for glass glazing, or a soft cloth and water (and some gentle soap if it's really dirty) for plexiglass. Take care that any cleaners you use do not come in contact with the frame - they could dull or damage it.
If your artwork was professionally framed and is taped on the back, there should never be any need to open up the frame and clean the glass. The tape has created a seal that keeps out dust, dirt, and moisture, and if you have purchased acid-free and UV-protective contents, opening it could simply introduce new and unwanted particles and chemicals into the space. If this is the case, skip to the next section on cleaning the picture frame (with the artwork intact).
If you change photographs regularly in your picture frames, you may want to remove and clean the glazing well each time:
- Lay a soft cloth on the clean surface you will be using. Never lay your frame face-down without cushioning underneath; this will scratch the frame, regardless of the material or quality.
- Remove the backing and place the photograph and mat somewhere safe, well away from whatever you are using to clean the glazing (stray glass cleaner or even water spray can ruin your photos).
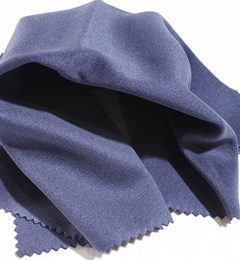
- If the glazing is glass, you can use glass cleaner spray and a soft cotton or microfiber cloth to clean it. If it is acrylic (plexiglass), do not use glass cleaner, just use soap and water. Do not use paper towel to dry acrylic - it can scratch.
- Take this opportunity to give the frame a good cleaning as well; you risk dirtying the glazing again if you clean it after the contents are reassembled. The next section explains how to clean your frame.
- Make sure the glazing has dried completely (leaving it for a few hours is the safest bet) before returning it to the frame. Moisture can condense inside the frame and damage the artwork, or cause it to stick to the glazing.
- If you have compressed air, you may use it to clear dust from the inside of the glazing before placing the photograph. Otherwise, use a dry, soft cloth, or blow very gently. Once the mat and picture are returned to the frame, you may want to carefully hold it up to make sure no dust specks are visible before replacing the backing.
- Replace the backing after ensuring there is no dirt or other debris stuck to the back of the picture or the inside of the backing. Any bumps will be pressed against the photograph and can cause dents.
|

Use glass cleaner or soap and water to clean glazing

A microfiber cloth will not scratch the glazing
|
| CLEANING THE FRAME
|
 |
|
In many cases, regular dusting is the only cleaning your picture frames will need. If you dust often enough to keep debris in the air from adhering to the frame, there is often no reason to dismantle or even wet-wipe your frame. The exception to this is frames displayed in the kitchen or dining room. Because cooking foods releases grease particles, it is likely your frame will need to be wiped down once in awhile no matter how well you dust.
If you are doing more than dusting, be sure to remove your art from the wall before you wipe it down. By pressing - even gently - on the top of the frame, you are putting strain on the hangers and/or the wire, which could cause them to weaken and break over time. When you take the frame down, spend a moment examining the hangers to make sure they are still well attached, and the wire hasn't loosened.
If you need to use water or cleaner, be sure to spray onto your cloth, not onto the frame - this will prevent you from using too much and having it seep into the frame (in the case of wood frames).
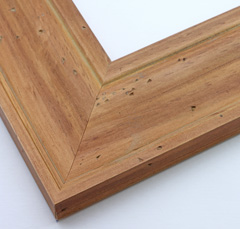
A dust cleaner can be used on lacquered wooden frames (those with a smooth shine) if they are quite dirty or dusty. A slightly dampened cloth also works well to remove any caked-on dust. For wooden frames with ornate designs or small grooves, use a cotton swab or a toothbrush to - gently - remove dust from the hard-to-reach spaces. If your wooden frame is not varnished or lacquered, do not use a dust spray on it - the unfinished wood will absorb it and cause discoloration.
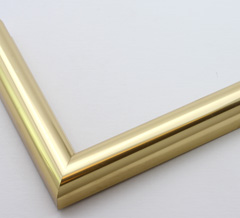
If your metal frame is gold-colored, silver-colored, or aluminium, a slightly damp cloth should work well to remove any dust. If it is particularly dirty, a small amount of gentle soap can be used as well. A cotton swab can reach any small recesses, but a toothbrush is not recommended. For any uncoated frame - such as solid pewter or sterling silver - use a silver cleaner and follow the instructions on the bottle.
If you don't know the frame material, test out your cleaning method of choice on the the back or bottom of the frame where the finish is the same but any potential damage won't show.
|

Clean untreated wood with water only

Clean metal frames with soap and water
|
|
Your framed pictures are important to you, so their containers should be treated with the same care. A dusty or dirty picture frame can distract the viewer from the real objective: admiring your beautiful images.
If you have any questions about this or our other products and services, please do not hesitate to contact us. Our knowledgeable staff are always happy to offer answers, advice or suggestions.
|
|
© 2002-2026 - KeenART Media Ltd.
|
|
| |
|
